opening remarks
The following article deals with a special application of 3D printing. The project described here was realized by the company Formwerk3D, for which I now work.
When parts are missing
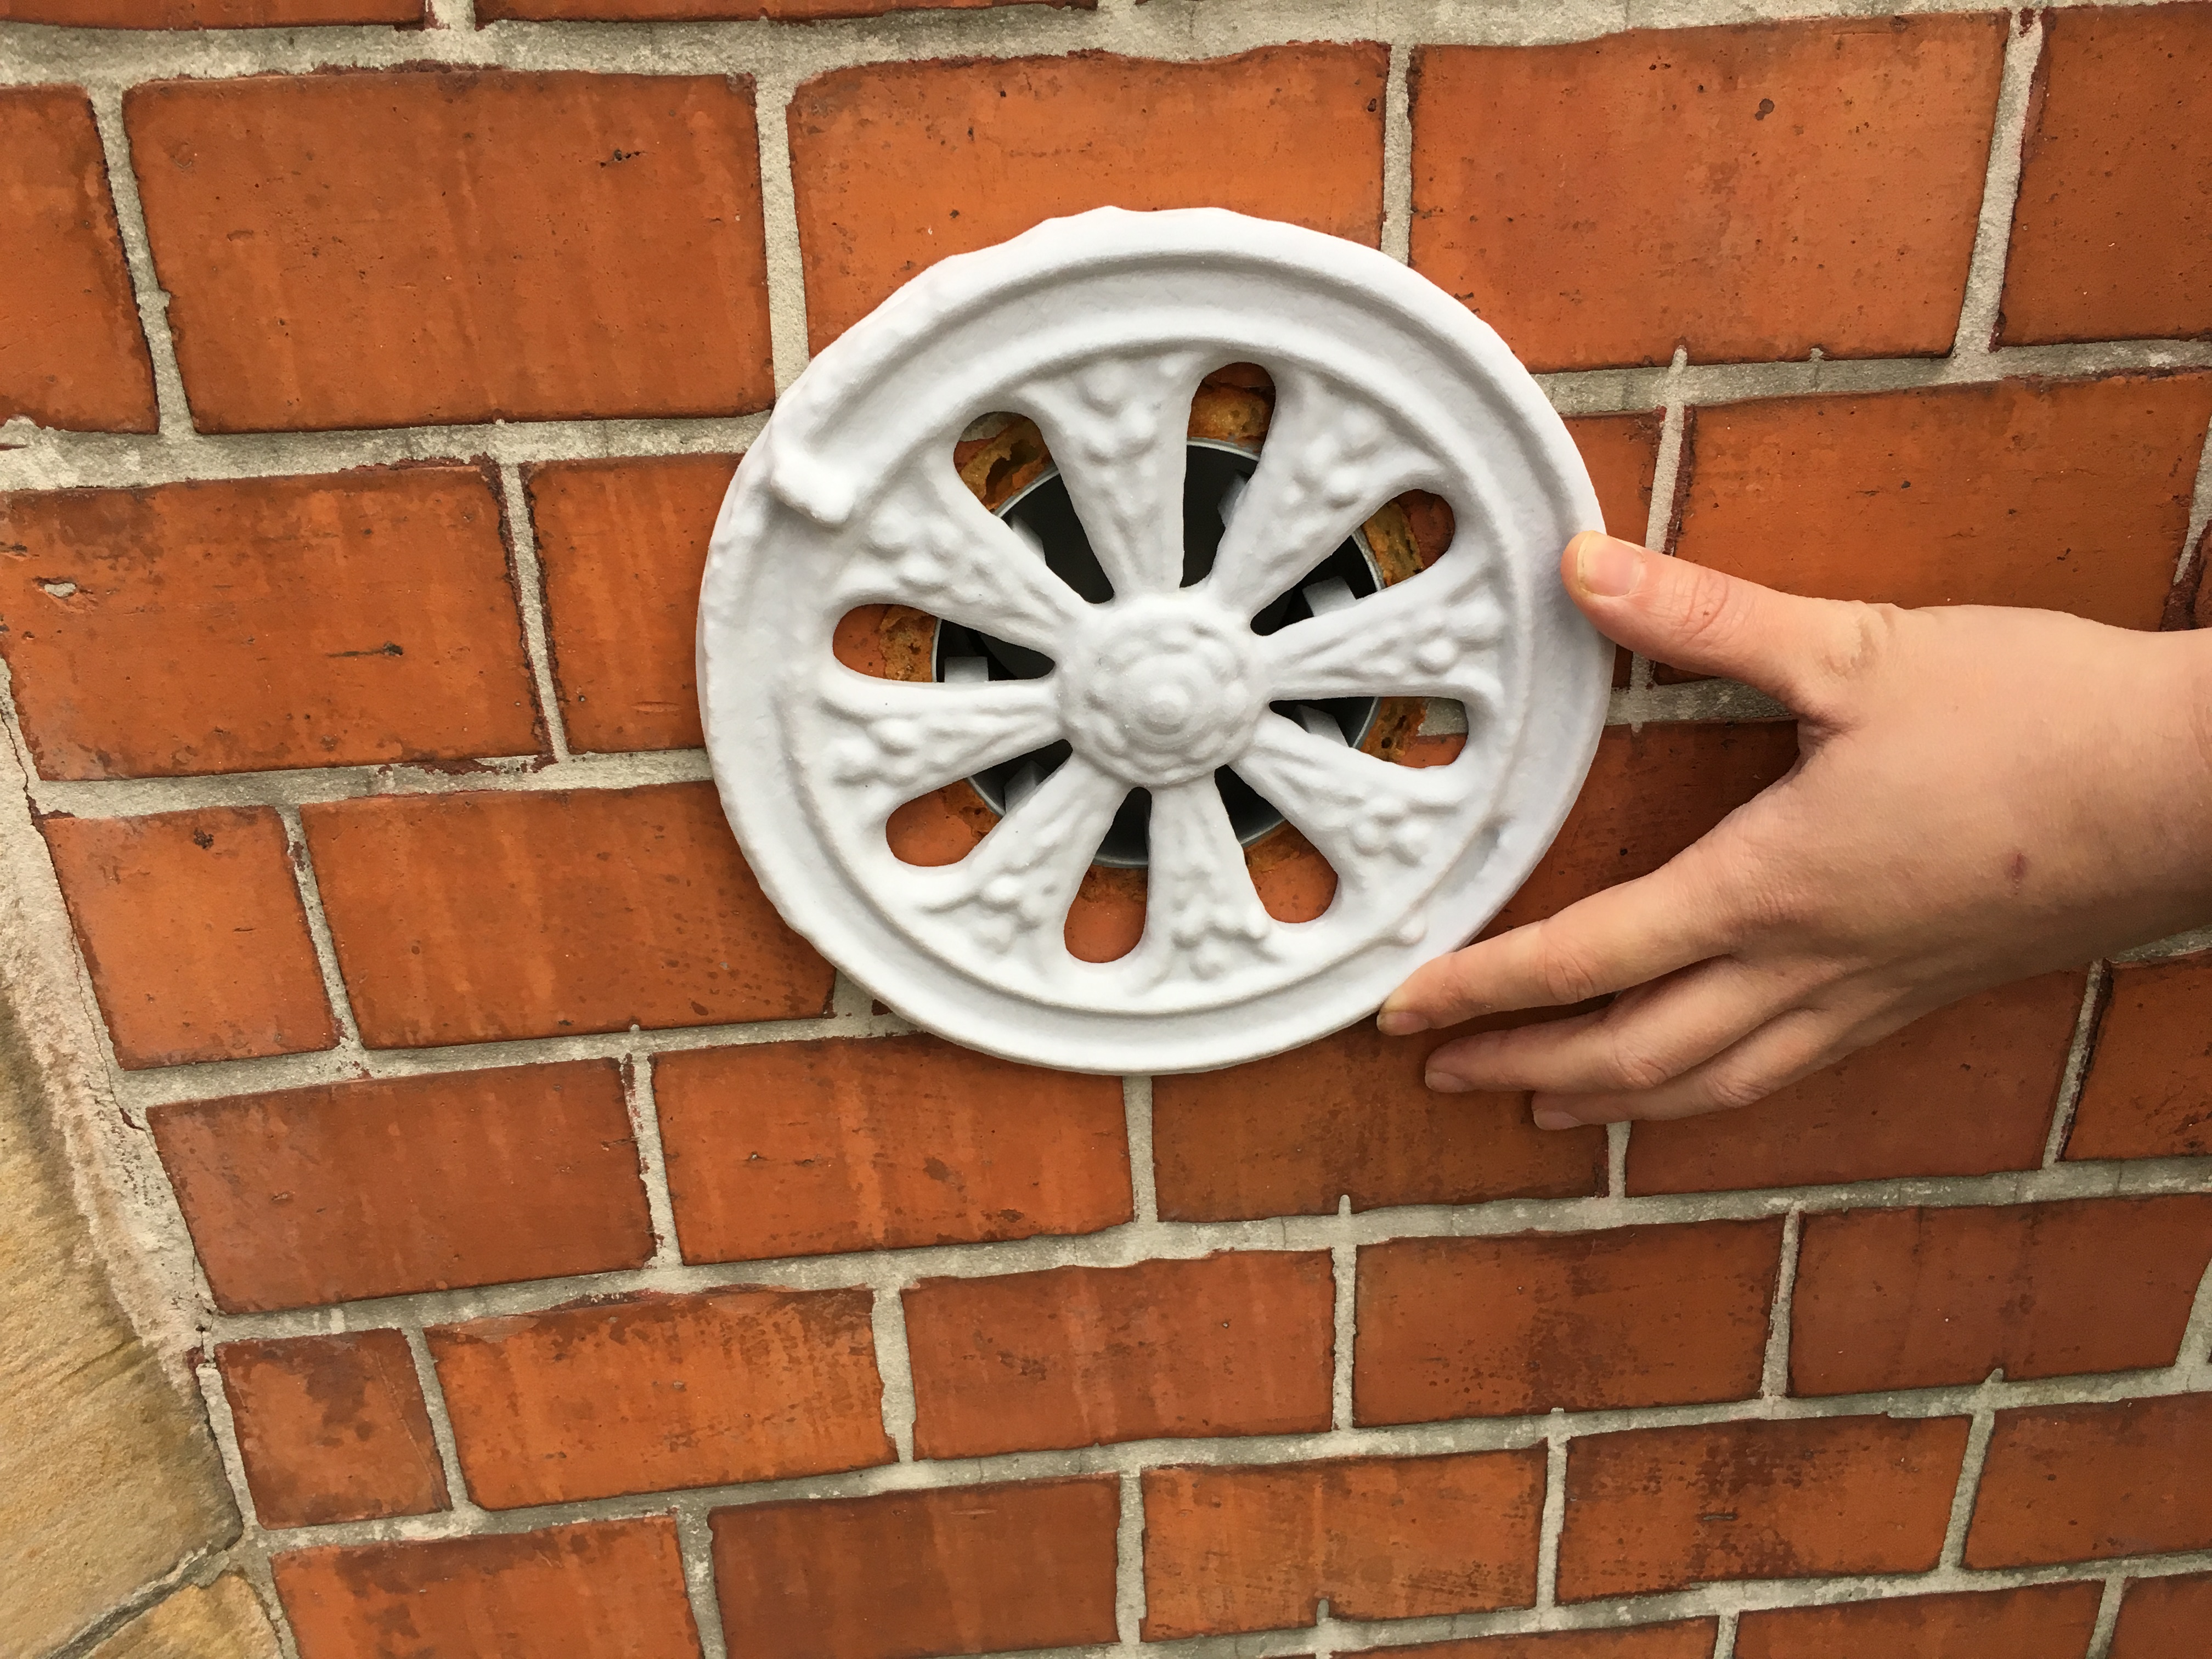
Some time ago, we were contacted by the owner of a beautiful old building with an interesting request. The old building in question had been completely renovated. In the process, the cellar vents were installed on the outside of the house with new pipes and a clean finish. Originally, these ended about one meter above the ground, in three places on the front of the house, in relatively large irregular holes in the wall.
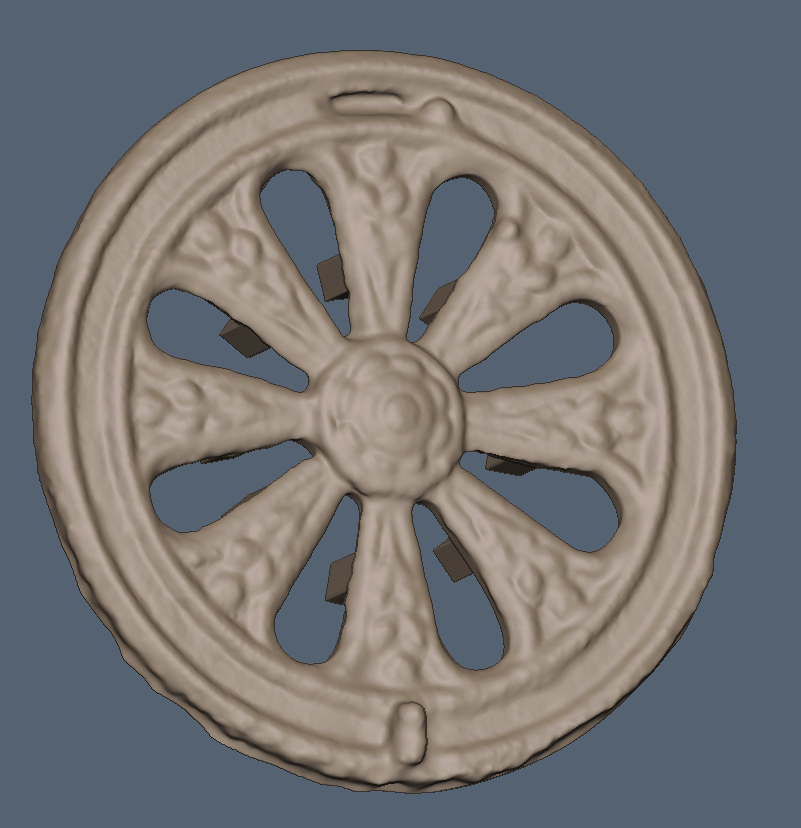
As simple holes are not particularly attractive and therefore do not match the façade of the building, ventilation outlets such as these were originally closed off with ornate cast-iron plates. Fortunately, a single one of these ornamental plates was still in place and firmly attached to the building. The panel consists of individual spokes that lead from a profiled edge to a floral central motif. Abstract female figures are depicted on the individual spokes, which stand out from the surface in relief.
Now the question arose, how do we replicate this preserved panel to suitably clad the two freshly renovated fume hoods?
Data recording
As the plate could not come to us for digitization, we decided to take photogrammetric images of the object on site. The main reason for this was that it is firmly attached to the building and therefore could not be sent to us for digitization without risking damage to the object.
Fortunately, the overcast weather was ideal for a quick on-site appointment, and we were able to capture good source images for the object reconstruction.

Data refinment
After calculating a mesh in the photogrammetry software, the model still had to be heavily modified. The free areas between the spokes were already excluded from the calculation by masking the unwanted areas before the camera was aligned. We left the surrounding wall in the model for orientation and for later adjustments and scaling. Unfortunately, this model now only consists of one surface and is therefore an open shell without volume. For a 3D printout, however, a solid model is required, which must be watertight. The normals of the individual surfaces must also be properly aligned to avoid holes later on. We created this by using a voxel sculpting program. In the first step, the envelope is given a thickness and converted from polygons without dimensions into voxels.
In contrast to polygon models, voxel objects not only have a shell, but also a mass that can be deformed as required. Smaller fault clusters inside the model can also be easily removed in order to avoid cavities later on or to create them in a targeted manner. When converting a voxel model to a polygon model, the result is always a watertight model.
The back was then closed, the wall removed and the surface smoothed. Sculpting programs are particularly suitable for the subtle adjustment of photogrammetric models. The object behaves as if it were made of clay and can be edited in a targeted manner using a wide range of tools.
Manipulation of scanned objects
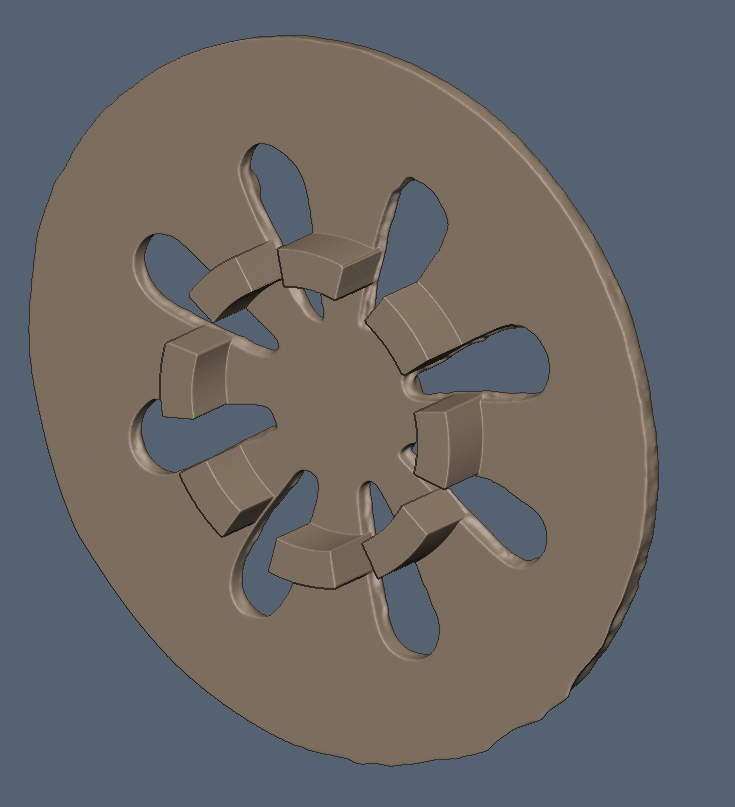
The original decorative panel covers a very large, irregularly shaped hole in the house wall. In contrast, the renovated ventilation outlets consist of smaller round pipes with a standardized diameter. We added brackets so that the panels could be positioned evenly and centered over the hole. These are only positioned under the spokes and their outer radius corresponds to the inner radius of the tubes. They are not visible from the outside, as they are only located under the spokes of the object. We also adjusted the slightly uneven height of the object, which probably arose when it was glued to the surface.
Material choice
Now that we had made the finished model printable. The question of the material for the printout arose.
Plastic (PLA/filament) was ruled out relatively early on, as considerable post-processing is sometimes necessary before the surface is free of any staircase formation. Printing in metal, which some suppliers now offer, was ruled out for cost reasons.
We also briefly considered creating a copy using a CNC milling machine. Although milled metal is particularly resistant and durable, this also turned out to be too expensive.
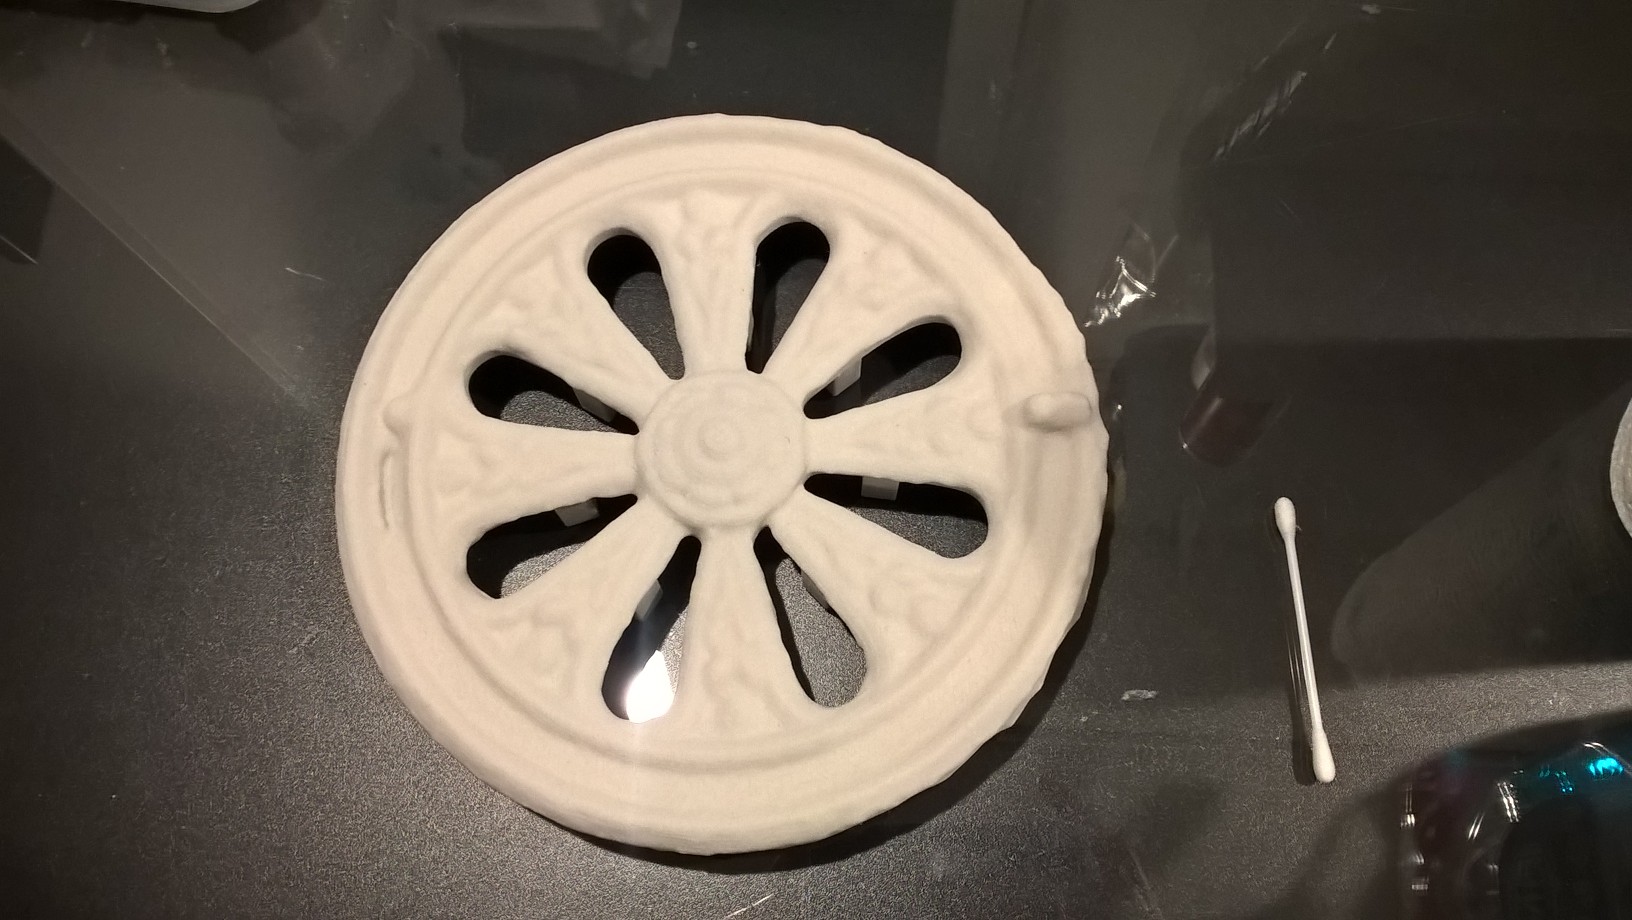
We then finally decided on a printout in our plaster printer. This is a ProJet 660, which is also suitable for full-color prints. During the printing process, fine layers of plaster are repeatedly placed on top of each other and glued together in the area of the future model using a binder. Each of these layers is 0.1 mm high, allowing extremely fine structures to be printed.
Immediately after printing, the model is still very soft, as only the binder holds the individual model layers together. However, the surface can easily be reworked with sandpaper to remove any fine steps. The still very delicate object was then treated with a large amount of epoxy resin. This makes the printed product extremely strong and can be made even more durable with a variety of different paints and varnishes. In this case, the raw panels are coated with a matching varnish to make them finally suitable for outdoor use and to match the color of the original.

Outlook
Using modern scanning and printing processes, complex objects on buildings can be replaced easily and cost-effectively. An extremely wide range of scenarios are conceivable, from simple molded stones to replaced missing statues. Thanks to the wide range of painting and surface treatment options, including electroplating, these repairs can be made almost invisible or, if required, clearly highlighted. Conversely, molds of existing objects can of course also be printed, which can be used to replicate larger quantities of objects.
Are you interested in 3D scans, prints, reconstructions, workshops or questions?